Weekly Farm Status Update 5/11/14 (and a great mother’s day gift)
A lot has been happening around the homestead this week. The garden is exploding. I’ll get to all of that in a moment. First, baby T gave us the most amazing Mother’s Day gift in the world: she took her first step! She’s been getting close to it for a while, and she’s tried all weekend, and finally she did it. She promptly fell down of course, but wow! What a day to start walking!
Ok, now for the farm stuff.
Our First Market Day
Laughing Bird Farm’s first farmer’s market was a success. Not a huge success, but a success nonetheless. We learned a lot and made about $100 which is nothing to sneeze at, especially given our distinct lack of product. Here’s some of the lessons we learned:
- Signage and displays are key. We need to work on these before next month.
- We need more product. The booth needs to look full.
- The kids need to wait to come out until after it starts to cool off. (I know, this one should have been obvious.)
- Disposable tablecloths do not work well for the kind of products we have. We’ll pick up some vinyl ones before next month.
- Most important of all, we learned how NOT to pack fresh herbs. Not that we had that many to begin with, but I ruined them all by packaging them in plastic baggies. I thought they’d be okay despite the heat and humidity. Not. I’ll do some research into the best way to package them before next month.
I forgot to take pictures, unfortunately. We were just too busy. I’ll try to snap a few next month.
What’s growing in the garden
A little bit of everything! It’s really popping. The corn’s not in yet, but the plot is mostly ready, and the seeds will go in on Tuesday or Thursday of this week. Here’s a list of the current crops:
- Lots of herbs including basil, sage, lemon balm, cilantro, parsley, thyme, and peppermint.
- Potatoes (see pictures below)
- Radishes
- Pole Beans
- Lima Beans
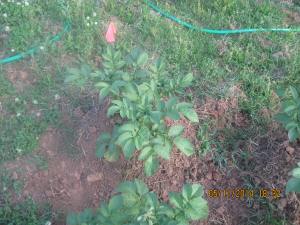
The potatoes are really growing fast. They were first hilled just 8 days ago. Take a look at this picture of one of them I took tonight.
Yep -they had to be hilled again. This time I used straw instead of dirt. I’ll see how it works. And one of them is starting to flower.
It won’t be long now!
The Orchard
Our fruit trees and berry bushes are mostly doing well, with the exception of the Pineapple Pear tree, which has never leafed out. I’m reluctantly calling it a loss. I’ll contact the nursery for a replacement sometime next month.
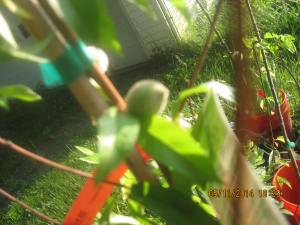
Check this out, though. I discovered tonight that our peach tree tried to set fruit this year. I knew it bloomed, but this was the first time I found a sign of fruit.
There were several of these, and since the tree is too young to bear, I pulled them all off.
What’s waiting to be transplanted
Quite a lot, actually.
- Lots of herbs
- Tomatoes
- Peppers, both hot and sweet
- Tomatillos
- Eggplants
- Swiss chard
- Butternut Squash (a gift)
- Zucchini (also a gift)
Chickens!
We’ve got 16 days until our chickens arrive. I guess I better get started on, ur that is finish, the coop. I’ll leave it to you to decide which one is the true statement. 😉
Until next time, happy gardening and homesteading. And happy Mother’s Day to all the moms out there!
Hail Spring!
Come in and be welcome!
Here’s some pictures for the first day of spring. Some of them are a little blurry, but I did my best.
 This blackberry has grown at least an inch in the past week!
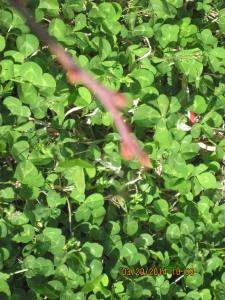 Swelling growth buds on one of the blueberries.
 A new growth tip on one of the pawpaws.
I couldn’t get a decent, much less good, picture of it, but the cherry has a leaf bud opening up. I’ll try to get a picture of that one in the next few days as it finishes opening.
Planting Edibles
Our trees and bushes are here! Not only are they here, but they are in the ground. The package arrived late Thursday afternoon. Too late to plant them unfortunately, unless I did it with a flashlight. So I got to work early Friday morning. And a long day’s work it turned out to be.
I had planned to have all the holes dug before the plants arrived. Yeah, that didn’t happen. I had to finish digging the rest of the holes -I had 9 left -first thing. Then I went to the store for mulch and topsoil. The clock had almost struck noon before I ever planted anything.
I’m going to describe the process of planting fruit trees and berry bushes for those who don’t know. Don’t worry -there will be lots of pictures!
Step 1.) Choose what type of tree you want to get and select a variety that does well in your area.
You can buy trees and bushes either in containers or bare-root. Bare root trees are cheaper and have a wider selection; potted trees have a better survival rate. Make sure that any varieties you select do well in your area. Just because the tree is listed for your zone doesn’t mean it will work well in your specific region. If you are only planting one of a species, make certain it is self-pollinating or you won’t get any fruit. I also select varieties based on ripening time and disease resistance.
Your local nurseries will have container grown trees in the spring and fall. You’ll have to order bare root trees from a mail-order nursery. There are many fine mail-order nurseries, but I recommend beginner’s stick with those on the Top 5 list at Dave’s Garden.
Step 2.) Dig a hole at least as deep as the roots and at least twice as wide.
You don’t want to skimp on the size of the hole; it could be fatal to the tree or bush. Newly planted trees need loose soil to expand into. My holes always end up being far too big. Here’s a picture of one of the holes I dug for the blackberry bushes.
Step 3: Gently remove the plant from its wrappings and place it in the hole.
The crown of the plant should be at or above soil level once the hole is filled. Most bare root trees will have a paint mark to indicate planting depth. If all else fails, look for residual dirt on the trunk to see how deep it was planted in the nursery. Remember that it’s always better to plant a little too shallowly than too deeply.
If the hole is too deep, go ahead and backfill some of the dirt.
Tip: Exposure to air, especially wind, can be fatal to bare root trees. Keep their roots wrapped in plastic or newspaper right up until you go to plant them. Even a few minutes of exposure to high winds can dry out fine root hairs enough to kill the plant. To remove a container grown plant from its container, turn the container on its side at a downward facing angle and gently slide the plant out.
Our trees were a mixture of bareroot and container grown plants. I expected the berry bushes to all be bare root, so imagine my surprise when I opened the box containing the blackberry bushes and found this:
Hello gorgeous! Sure they were smaller than I expect, but I’ll trade a flat for size any day.
Spread the roots of bare root trees out in the hole. If a potted plant is root bound, gently tug at the bottom of the plug to loosen the roots, like so:
Step 4: Backfill the hole with soil.
Amending your native soil with topsoil is optional unless you have really poor soil. Do not replace your soil with topsoil; this will create a “flower-pot” effect that will eventually weaken or kill the plant. Aim for less than a 50/50 mix. If you choose to use topsoil, get good quality topsoil. It should look like this:
If you’re at the home improvement store and you’re trying to choose topsoil, the good stuff is usually around $2 for 0.75 cubic feet and the cheap stuff is about $1.50 for 2 cubic feet. Don’t skimp on the quality of your topsoil. If you need a lot, call your local farm supply store and ask about a truckload.
Step 5: Water and Mulch
Water deeply and then spread a layer of mulch 2-3 inches thick around the newly planted tree or bush. Keep the mulch away from the trunk so the bark won’t rot.
Newly planted blackberry bushes. That’s my flannel overshirt off to the side. I’m a real fashion plate!
Step 6: Stake and Guard if necessary
Most trees don’t need to be staked unless they’re really small or in areas with high winds. Guard the trees if rabbits or deer are a problem. You can make inexpensive guards out of a roll of window screening and some zip ties.
That’s it! Some more pictures:
 One of the pawpaws. (The camera is at an angle, not the tree.)
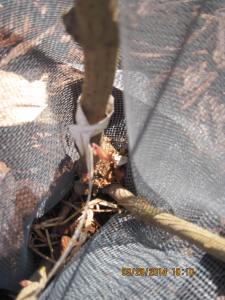
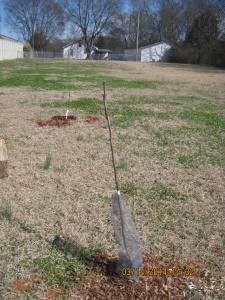 One of the pears with rabbit guard.
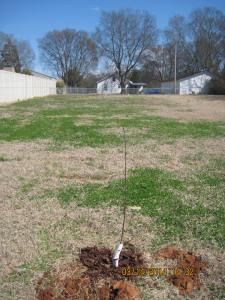 A self-pollinating sweet cherry tree.
Everything is in the ground and alive right now. We’ll see how they do.



Recent Comments