Tilling
The garden is tilled and almost ready to plant! It took a lot longer than expected (what doesn’t when you’re doing it yourself?) but we finished it on Sunday. The original plan was for me to spend all day Friday tilling it myself. That didn’t happen, and quite frankly, I’m glad.
The tool rental place made us a deal: pick up the tiller after 3 on Friday and we could keep it until Monday morning at the one day rental rate. After some discussion, we decided that was the way to go and I’m glad we did. If you’re going to till a new garden area this year, I highly recommend you rent the tiller instead of buying one, unless you have a good bit of cash to spare and can pick up a good one cheaply. The one we rented had about twice the power of one we could afford to buy. Plus, it was considerably cheaper. The cheapest tiller we found that would work for our needs cost $300 new. Total rental cost: $54 for the day, plus $1.44 in gas.
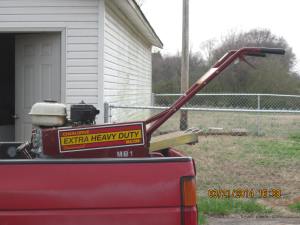
Here’s the tiller when I got it home on Friday:
We got to work about 5 o’clock on Friday. T spent the night with her grandmother so we had all evening. 2.5 hours later, when darkness closed in, we’d done the first pass over half the garden area. And it sucked. It probably won’t take you that long to till your new garden area; ours is about 1500 square feet, which is considerably longer than average.
How long it will take you to till will depend on several factors: the type and condition of the soil (clay soil takes longer), how long it’s been since your ground was last tilled, and the power of the tiller you use. Always use a front-tine tiller to till an area covered in sod. It’s the most efficient way. You really need to be in good shape to till; if you’re not, consider hiring out the job. It won’t cost you much more than renting a tiller. If you’ll only be tilling a small area it might even be cheaper.
A note for those without much upper body strength: This means the majority of women and small-statured men. Tillers are not built for us. They just aren’t. This doesn’t mean you can’t use one. I did. It just means it’s going to be considerably harder. Don’t give up.
Back to the task at hand. Neither one of us had time to till on Saturday, so we had to get it down on Sunday. It took another 1.5 to finish the first pass. The first pass is the one where you chew up the sod. You may only have to do one pass if you don’t have clay soil.
We aren’t that lucky, but the second pass proved to be much easier than the first -it only took an hour to do the whole plot!
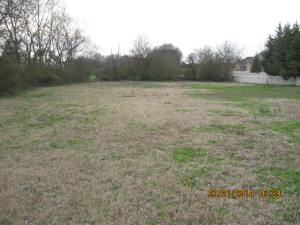
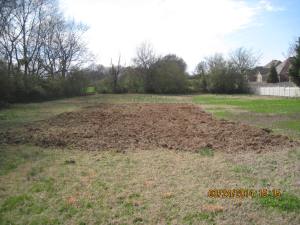
Here are the before and after pics:
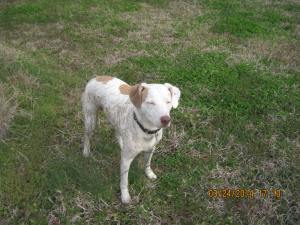 Floyd dog helped take the pictures after rolling in the grass that’s been composting at the back of the yard all winter.
I marked out the rows and paths yesterday. Today I’m hoping to get the cover crop in the ground. It’s slowly coming along!
Expect an update on plants and the house soon.
Hail Spring!
Come in and be welcome!
Here’s some pictures for the first day of spring. Some of them are a little blurry, but I did my best.
 This blackberry has grown at least an inch in the past week!
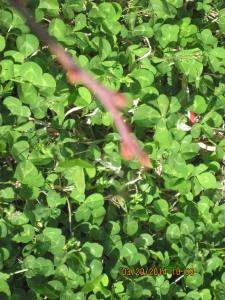 Swelling growth buds on one of the blueberries.
 A new growth tip on one of the pawpaws.
I couldn’t get a decent, much less good, picture of it, but the cherry has a leaf bud opening up. I’ll try to get a picture of that one in the next few days as it finishes opening.
Planting Edibles
Our trees and bushes are here! Not only are they here, but they are in the ground. The package arrived late Thursday afternoon. Too late to plant them unfortunately, unless I did it with a flashlight. So I got to work early Friday morning. And a long day’s work it turned out to be.
I had planned to have all the holes dug before the plants arrived. Yeah, that didn’t happen. I had to finish digging the rest of the holes -I had 9 left -first thing. Then I went to the store for mulch and topsoil. The clock had almost struck noon before I ever planted anything.
I’m going to describe the process of planting fruit trees and berry bushes for those who don’t know. Don’t worry -there will be lots of pictures!
Step 1.) Choose what type of tree you want to get and select a variety that does well in your area.
You can buy trees and bushes either in containers or bare-root. Bare root trees are cheaper and have a wider selection; potted trees have a better survival rate. Make sure that any varieties you select do well in your area. Just because the tree is listed for your zone doesn’t mean it will work well in your specific region. If you are only planting one of a species, make certain it is self-pollinating or you won’t get any fruit. I also select varieties based on ripening time and disease resistance.
Your local nurseries will have container grown trees in the spring and fall. You’ll have to order bare root trees from a mail-order nursery. There are many fine mail-order nurseries, but I recommend beginner’s stick with those on the Top 5 list at Dave’s Garden.
Step 2.) Dig a hole at least as deep as the roots and at least twice as wide.
You don’t want to skimp on the size of the hole; it could be fatal to the tree or bush. Newly planted trees need loose soil to expand into. My holes always end up being far too big. Here’s a picture of one of the holes I dug for the blackberry bushes.
Step 3: Gently remove the plant from its wrappings and place it in the hole.
The crown of the plant should be at or above soil level once the hole is filled. Most bare root trees will have a paint mark to indicate planting depth. If all else fails, look for residual dirt on the trunk to see how deep it was planted in the nursery. Remember that it’s always better to plant a little too shallowly than too deeply.
If the hole is too deep, go ahead and backfill some of the dirt.
Tip: Exposure to air, especially wind, can be fatal to bare root trees. Keep their roots wrapped in plastic or newspaper right up until you go to plant them. Even a few minutes of exposure to high winds can dry out fine root hairs enough to kill the plant. To remove a container grown plant from its container, turn the container on its side at a downward facing angle and gently slide the plant out.
Our trees were a mixture of bareroot and container grown plants. I expected the berry bushes to all be bare root, so imagine my surprise when I opened the box containing the blackberry bushes and found this:
Hello gorgeous! Sure they were smaller than I expect, but I’ll trade a flat for size any day.
Spread the roots of bare root trees out in the hole. If a potted plant is root bound, gently tug at the bottom of the plug to loosen the roots, like so:
Step 4: Backfill the hole with soil.
Amending your native soil with topsoil is optional unless you have really poor soil. Do not replace your soil with topsoil; this will create a “flower-pot” effect that will eventually weaken or kill the plant. Aim for less than a 50/50 mix. If you choose to use topsoil, get good quality topsoil. It should look like this:
If you’re at the home improvement store and you’re trying to choose topsoil, the good stuff is usually around $2 for 0.75 cubic feet and the cheap stuff is about $1.50 for 2 cubic feet. Don’t skimp on the quality of your topsoil. If you need a lot, call your local farm supply store and ask about a truckload.
Step 5: Water and Mulch
Water deeply and then spread a layer of mulch 2-3 inches thick around the newly planted tree or bush. Keep the mulch away from the trunk so the bark won’t rot.
Newly planted blackberry bushes. That’s my flannel overshirt off to the side. I’m a real fashion plate!
Step 6: Stake and Guard if necessary
Most trees don’t need to be staked unless they’re really small or in areas with high winds. Guard the trees if rabbits or deer are a problem. You can make inexpensive guards out of a roll of window screening and some zip ties.
That’s it! Some more pictures:
 One of the pawpaws. (The camera is at an angle, not the tree.)
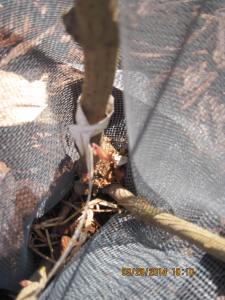
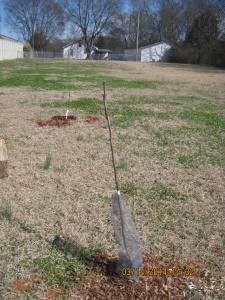 One of the pears with rabbit guard.
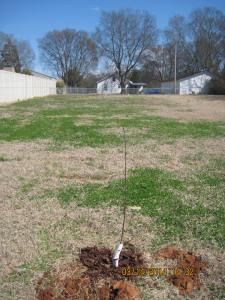 A self-pollinating sweet cherry tree.
Everything is in the ground and alive right now. We’ll see how they do.
Trees!
And berry bushes and grape vines, oh my!
It’s official -our spring order of trees and other such goodies is on the way! It shipped last night and should be here on Thursday. Here’s a run down of what’s coming in:
-4 blueberry bushes
-6 blackberry bushes
-6 raspberry bushes
-3 grape vines
-2 elderberry bushes
-2 pear trees
-2 pawpaw trees
-2 cherry trees
These will join the peach tree and the plum tree we already have. Now I just have to finish digging the rest of the holes before Thursday. I’ve only got 9 to go. That’s not that many, right? Right?Oh well. At least it’s raining this morning. That will make things easier!
Our Property
Laughing Bird Farm is our second property. Our first consisted of 10 acres of raw land we purchased in Tennessee several years ago. We were determined to build a house and make a go of it on that property, but we had to live in town for work in the meantime and could only get to the property on weekends. A two hour commute each way is far too long for practicality, and there were no decent jobs in the area. This proved to be infeasible, especially once it got close to time for little T’s arrival, so we sold the property and looked for something closer to town.
This necessitated a lot of trade-offs. Our property in Tennessee cost one-fourth of what we paid for our current land. Of course, it was raw land, two hours from the metro area, and didn’t have a house. Before we started our property hunt we sat down and made a list of the features we needed and wanted. Here’s a short list of the necessities: a house on at least an acre lost, a decent commute time to work, lots of usable gardening space, and no restrictions. Our wish list included lots of storage space, a fenced back yard for the dogs, and a workshop area.
None of this would have been hard to find if we had a larger budget. But we both have modest incomes, and we wanted to find a property where it would be possible to make the payments on one income. This was an absolute requirement of mine; I’m not willing to risk losing our land because we bit off a larger mortgage than we could chew. Our particular wants and our low budget gave our wonderful real estate agent a lot of headaches, but she stuck with us while we looked at property after property over a three month period. We had one deal fall through when the house failed inspection (to the tune of $50k+ of foundation work!) and another when we were outbid. Those properties didn’t work out because the one we purchased was meant to be. I’m not normally a believer in fate, but this worked out nicely.
We found the property late in July. Both of us obsessively checked the online listings several times a day, looking for anything new that might pop up. I had already checked the listings before I went to work, but I hadn’t been there an hour when Kelly called me. She sounded so excited I had a hard time understanding her at first. A new listing had just come onto the site –the posting time was about five minutes before she found it. It looked absolutely perfect and was actually under our budget cap. I called our agent right away and we both took off work early to see it, with our 6 week-old daughter in tow. We submitted our offer right away, at full asking price with only the home inspection as a condition, and waited nervously to hear whether or not it was accepted.
Some back and forth ensued, but the owner finally accepted our offer, and by that time two other couples had submitted offers and there were others lined up! It’s a good thing we jumped on it that morning.
So, about the property itself. Laughing Bird Farm is just over an acre. It’s a mini farm of course, but there’s lots you can do with a mini farm when you do intensive gardening and permaculture. The property is a rectangle running east and west. The east side of the property is bordered by a major road. The north side of the property is fenced off and on the other side sits an upscale subdivision. Other middle and upper class subdivisions are in the area, but our property is located in the county and is completely unrestricted.
The west and south sides of the property are totally enclosed by a thick hedge of hollies, hackberries, roses, and crabapples. Our house sits near the front of the property behind a small lawn. We have an old farmhouse, only 1300 square feet but enough for us. There are three bedrooms (though one is really small) and the house was built in three sections by the family who used to own our land and much of the surrounding land. It needs lots of updates but that’s okay by us. We’ll be doing most of them ourselves as time and funds become available.
Behind the house is a backyard and a garage/workshop that’s almost as big as the house at 1200 square feet. The yard wasn’t fenced when we closed on the house, so that’s the first thing we did. The rest of the acreage stretches out beyond the yard and garage and is perfect for gardening and a food forest.
Our first priorities this year are to get the food forest planted and start our annual garden and our mushroom patch. We have several trees and berry bushes on the way, including pawpaws, pears, blueberries, blackberries, and cherries.
Our adventures have just begun. I’ll post some pictures soon.
Welcome to Laughing Bird Farm!
Welcome, everyone! Laughing Bird Farm is a small homestead in North Alabama. We are in zone 7a, with hot, humid summers and (usually) mild winters. We are just beginning our farm and will design it using permaculture principles. We hope to have a working homestead that can provide at least one income in the next couple of years.
The farm was purchased in the last part of 2013, so homesteading efforts have thus far been minimal. We’ve managed to move in and empty out (most) of the boxes, but any major efforts will have to wait until the coming of spring. This has thus far been the most brutal winter I’ve ever experienced in the south and it’s been far too cold to work outside.
Who We Are
Kelly has a Permaculture Design Certificate (PDC) and will be creating the majority of the design, as well as taking care of the mushroom patches and teaching permaculture courses. Rebecca will do much of the gardening. Baby T is focusing on learning to crawl, and thus will not be helping with the farm anytime soon!
What We Hope to Do
We hope to get our farm up and running as fast as possible. We want to produce enough food from the land to be at least partially self-sufficient. We would also like to generate enough income for one of us to stay home and work the land full-time within a couple of years. In addition, we hope to demonstrate the potential permaculture holds as a viable solution to the many problems facing our society.
2014 Goals
Here are our primary goals for 2014:
- Plant a large enough annual garden to help supply many of our family’s vegetable needs.
- Plant at least 50% of our food forest. The food forest will contain a minimum of 15 trees and at least twice that many shrubs and vines.
- Grow enough herbs to sell the excess in both fresh and dried form.
- Start an oyster and a shiitake mushroom patch.
Our Challenges
The biggest challenges, as with most such ventures, are money and time. We have a small child and busy lives; that limits us on time. As for money, we are doing this solely out of our own resources, and since those resources are fairly modest, progress will likely be slower than we would like.
What We’ve Done Thus Far
Not much, as mentioned above. We’ve ordered all of our garden seeds and the first shipment of fruit trees and berry bushes. Most of the seeds are in; the trees and bushes should be in around the end of February. We already have a peach tree (Contender) and a plum tree (Methley) and these are varieties coming soon: Sweet Cherry (Starkrimson), Pawpaws (Mango and Sunflower), Raspberries (Anne and Caroline), Blackberries (Triple Crown), and Blueberries (Misty, Pink Lemonade, Blueray, and Sweetheart).
What This Blog Is For
I (Rebecca*) intend to use this blog as a record of our progress. It will be a diary of the creation and operation of our farm, and a way to interact with our customers and the public at large.
*I will usually be the one posting. Posts by Kelly will be denoted as such.



Recent Comments